Front brake (drum type)
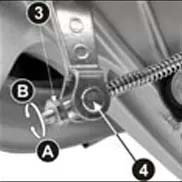
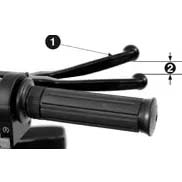
Check its operation and adjust the clearances if necessary
Drum Type Front Brake Adjustment
- Measure the distance the front brake lever (1) moves before the brake starts to grab, this clearance (2) should measure between 10-20mm to the tip of the brake lever.
- Make lash adjustments by turning and tightening the nut (3) on the front brake arm (4). Make sure the cutout in the adjusting nut is located on the brake arm pin after making final slack adjustment.
- Apply the brake several times and check for rotational play when it is released.
Note
If you cannot achieve a proper adjustment by this method, contact your nearest Authorized Hero Dealer, or authorized dealer dealer.
Rear brake
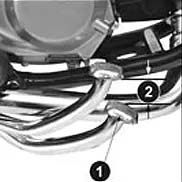
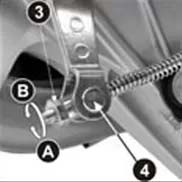
Drum Type Front Brake Adjustment
- Place the motorcycle on the main stand.
- Measure the distance (1) the brake pedal moves before the brake starts to grab, this play (2) should be 20 – 30mm.
- If adjustment is necessary, turn the rear brake adjuster nut (3). Make sure the cutout on the adjuster nut is on the pin of the brake arm (4) after you make final adjustment. Apply the brake several times and check the play in the rotation when it is released.
Note
If you cannot achieve a proper adjustment by this method, contact your nearest Authorized Hero Dealer, or authorized dealer dealer.
Brake wear indicators for drum type brakes
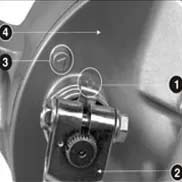
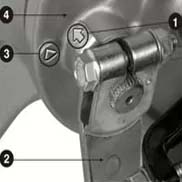
When the brake is actuated, an arrow (1) attached to the brake arm (2) moves toward a reference mark (3) on the brake panel (4), if the arrow aligns with the reference mark when applied. fully actuates the brake, the pads must be replaced
Front brake (disc type)
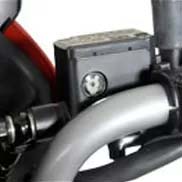
Check that the brake fluid level is correct in the master cylinder. The master cylinder or reservoir is located on the right handlebar.
Recommended brake fluid: point 3 or 4
Make sure the brake fluid level does not drop below the “MIN” mark on the master cylinder when checking with the master cylinder parallel to the ground. If the brake fluid level drops abruptly, check the brake system for leaks and consult your Hero Authorized Workshop or authorized dealer dealers.
Note
Clean accumulated dirt and mud between the brake pads, calipers and the disc using a water jet. Always contact your Hero Shop, Authorized Dealer or the dealer authorized by the Dealer. to refill the main cylinder when necessary.
Caution
Do not mix brake fluids from point 3 and 4.
Disc type brake wear indicators
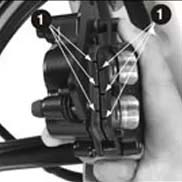
Check and examine the wear indicator (1) on each pad. If the wear limit groove in either pad reaches the edge of the brake disc, then replace the pads.
Brake pad wear depends on the severity of use, the type of driving, and the conditions of the streets and highways. In general, the pads wear out faster on wet and dirty roads. Inspect the pads regularly at each maintenance.
Warning
Always apply the front and rear brakes simultaneously to prevent the vehicle from skidding.
